The Art of Hand-Drying:
5 Steps to Salon Volume & Shine at Home
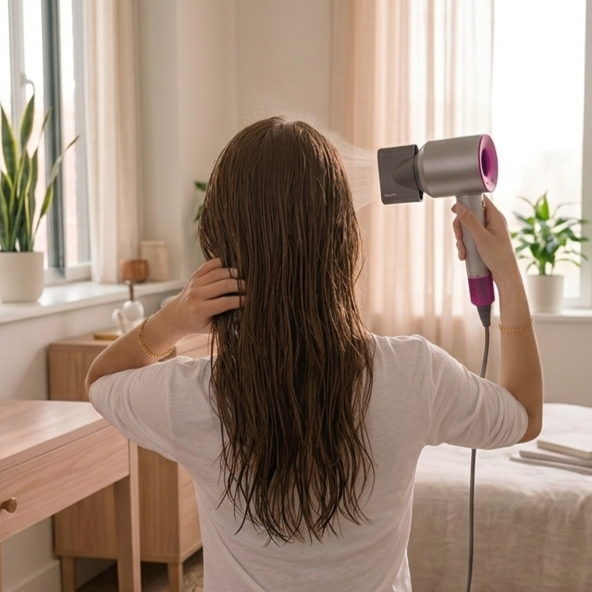
“Why does my hair look so smooth and voluminous at the salon, even when it is simply hand-dried without any brushes or styling tools, but turns flat and frizzy when I dry it at home?” It is a question we hear daily at Charmin Hair.
Today, we focus on the ultimate game-changer for your daily routine: The Art of Hand-Drying.
Improper drying habits are the leading cause of cuticle damage and collapsed root volume. An effective drying routine isn't just about applying heat; it is about working with your hair’s natural structure. Here are five essential steps to achieving salon-quality volume and smooth texture right at home.
1. Towel Drying: Minimising Friction Damage
When hair is wet, its keratin structure is at its most fragile. Rubbing or wringing your hair with a towel damages the delicate cuticle layer, leading to rough, frizzy strands. The Professional Technique: Wrap your hair in a soft towel and gently press to absorb excess moisture. For the scalp, use a gentle patting motion to remove water without causing friction.
2. Timing and Direction: Building Your Volume Foundation
Your hair locks into shape the exact moment it finishes drying. If you let it sit wet for too long, gravity and water weight will drag your roots down. Once they dry flat, no amount of heat can lift them back up unless you start over and get them wet again, ruining your volume foundation before you even begin styling.
Dry Immediately: Water-logged strands are significantly heavier than dry hair. Allowing hair to sit wet pulls the roots downward, locking them into a flat, lifeless position.
The 'Zero-Pressure' Touch: Wet hair is surprisingly weak against physical weight and pressure. If you press down or grip your hair too tightly while drying, you set a flattened shape against your scalp. Keep your hands soft and relaxed. Gently flick and toss the hair at the roots to let air circulate underneath so the roots dry standing up.
Section for Efficiency: If you have thick or long hair, clip the top layers up and dry the underlayers first. This reduces overall heat exposure and cuts your drying time in half.
Direct Roots Forward: Even if you wear a side or center part, dry all front sections forward towards your face initially. By directing the roots forward first and flipping them into your desired part at the very end, you create natural, long-lasting lift at the crown.
3. Precision Styling: 'Blow-Dry Contouring'
Blow-dry heat softens the hair structure, while the cooling process locks it into shape. You can easily balance your facial silhouette using our '3-Second Heat & Cool Rule':
To Build Volume (Crown & Roots): Lift the target section at the root using your fingers. Apply medium, warm air for 2 to 3 seconds. Remove the dryer, hold the hair in place, and let it cool for 3 seconds to lock in maximum volume.
To Tame Puffiness (Sides & Cowlicks): Flatten unruly side sections or crown cowlicks against the scalp using your palm. Blow warm air over the back of your hand for 2 to 3 seconds, then keep pressing firmly for 3 seconds as it cools to set a sleek, close finish.
4. Airflow and Temperature Control
Hair cuticles are arranged like shingles on a roof, overlapping from root to tip. Directing airflow along this natural slope seals the cuticle layer, allowing light to reflect evenly for maximum shine.
Airflow Angle: Align your hairdryer nozzle parallel to the hair shaft, pointing downwards at a 45-degree angle. This prevents flyaways and smoothes down raised cuticles.
Use Medium Heat: Avoid using the hottest setting directly against your scalp. Opt for a medium temperature setting and maintain a safe distance of 15 to 20 cm. Overly hot air dehydrates the scalp and degrades hair proteins.
The Cool-Shot Finish: Once your hair is roughly 80% dry, switch to the cool air button for the final 20 seconds. True 100% dry hair feels light, airy, and cool to the touch—if it feels heavy or damp, moisture is still trapped inside.
5. Essential Product Layering: Shield, Seal & Set
Heat styling without proper protection strips essential moisture from inside the hair shaft and weakens your style's hold. Essential product layering creates a protective barrier before blow-drying and locks in your finished shape afterwards—ensuring your hand-dried volume and smoothness last all day.
Pre-Blow-Dry (Heat Protection & Hydration): Apply a cream or lotion-based heat protectant to damp hair, focusing strictly from the ears down to the ends. This shields your strands against thermal damage while keeping your roots weightless and lifted.
Post-Blow-Dry (Moisture Seal & Style Hold): Once completely dry, work a small drop of hair oil or finishing serum through the ends. This seals in hydration, wards off humidity, and acts as the final anchor for your style.
(※ Choosing the right scalp serums and leave-in formulations for your specific hair type will be covered in our upcoming post!)
🇦🇺 Tailored Care at Charmin
Mastering a few simple adjustments in your daily drying routine can completely transform your hair's health, shine, and style longevity. If you are looking for a tailored home-care regimen or personalized styling advice suited to your unique hair texture, visit us at Charmin Hair in North Sydney. We are here to help you achieve effortless, radiant hair every day.